Design Test Cases
In this part of the interview, you decide how to test the Behaviours. The Wizard drafts the simulated users and the situations. Then it pairs them into Test Cases. The examples continue the research assistant from the guided interview.
1. Build your test cases
The Wizard drafts each part of the Test Cases, one review at a time. Check each part, then select Continue.
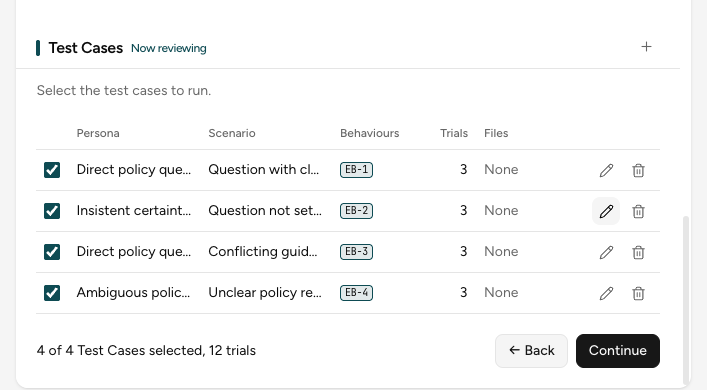
After the Wizard drafts the Test Cases, the web client shows them in a table:
In the CLI, you review the same Test Cases as a list. When you finish, the CLI saves the files in
experiments/design/<date>-<time>-interview/, with a short summary in outputs/review.md.
| Part | What it is | What you do |
|---|---|---|
| Persona | A simulated user who talks to your application | Edit or delete a Persona that does not match your real users, or select + to add one |
| Scenario | A situation to test | Make sure that the Scenarios cover the hard cases, such as a question that no policy answers |
| Fixtures | Files that a Test Case sends to your application, such as a policy document | Select the pen, then Add file in the Files cell |
| Trials | How many times a Test Case runs. The default is 3, so that one unusual run does not decide the result. | Select the pen and change the number |
Each Test Case links to the Expected Behaviours that it checks. If a selected Behaviour has no Test Case, the review names it. Add a Test Case for it before you continue. To leave a Test Case out, clear its checkbox.
2. Download the specification
The chat shows Your specification is ready. Select Download specification at the bottom of the Profile.
The browser downloads a ZIP file, for example 20261016-223045-interview.zip. Extract it into
experiments/design/ in the repository folder:
experiments/design/20261016-223045-interview/
├── inputs/
│   └── interview_state.json
└── outputs/
    ├── specification.yaml
    ├── target-binding.yaml   (only when you connect the target)
    └── fixtures/             (the files that the Test Cases send)
specification.yaml is the file that the Engine runs. To read or change its fields, see
Write your own specification. interview_state.json keeps the interview, so you do
not need to open it.
Finish early
To finish before the last step, select Skip interview and download specification. The Wizard
drafts the remaining steps without asking you. Then, on Run settings, enter the models for
the User agent and the Judge, or leave the fields empty to use .env. Select Continue
and download.
If the Wizard says "I couldn't finish this into a runnable evaluation on my own", continue the interview step by step.
Next step
Run the specification with the Engine:
1metis engine run --input-dir experiments/design/20261016-223045-interview/outputs/
Replace 20261016-223045 with the date and time in your folder name. See
Run your evaluations.